Modify central distribution list members in Outlook 2016 for Windows
A central distribution list is a collection of contacts with allows you to email multiple people within a group.
Once you have you list set up, you can modify the list members at any time.
You can only add or remove members in Outlook 2016, to change any other settings you will need to log into Outlook Web Access (OWA).
Before you start...
- You will need to have gone through the process of setting up your central distribution list first.
Instructions
1. Select the Home tab and click on the Address Book.

Fig 1. The Address Book option on the Home tab
View a larger version
2. In the Search section enter the display name of your central distribution list. E.g. +departmentname.distibutionlistname
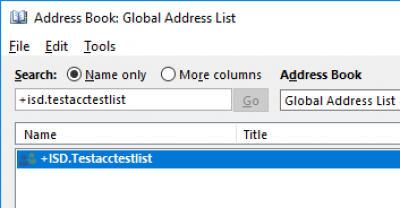
Fig 2. The Search field in the Global Address List (GAL)
View a larger version
3. Double click on the distribution list or right click and the select Properties. The details of the central distribution list will be displayed in a new window.
4. Click on the Modify Members… button
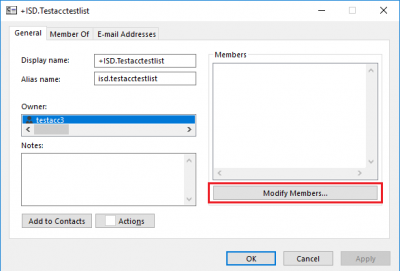
Fig 3. Example of a central distribution list and location of the Modify Members button
View a larger version
To add members
1. Click Add… and then search for the name or user ID of the person you want to add.
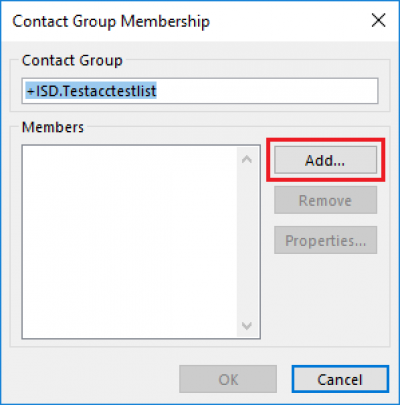
Fig 4. Location of the Add button on the Contact Group Membership box
View a larger version
2. Once you have found the person you want to add either double click on their name or highlight the name and click Add.
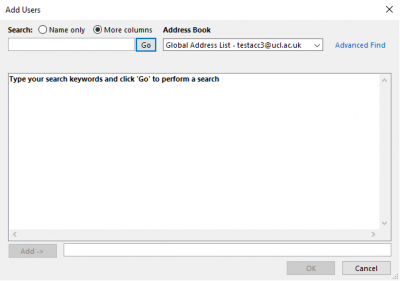
Fig 5. The Add Users window
View a larger version
Note: You can add more than one person at once by then searching for another name and following the previous two steps.
3. Once you have the people in your list that you want to add click the OK button.
4. You should then see them on the list. Click OK.
5. Click OK again to close the properties window.
To remove members
1. Search through the list for the person you want to remove. Highlight their name.
2. Click on the Remove button.
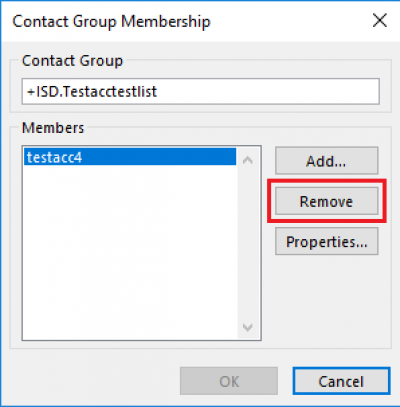
Fig 6. The Remove button in the Contact Group Membership box
View a larger version
3. Click OK.
Any changes that you make will take effect immediately after you click the OK button and close the window that displays the members of the list
Related guides and other info:
- About central distribution lists
- Modify central distribution list owners in Outlook Web Access
- Restrict/allow senders to a central distribution list in Outlook Web Access (OWA)
- Set message approval for central distribution list messages in Outlook Web Access (OWA)
Help and support
- Contact the IT Services.
Feedback
We are continually improving our website. Please provide any feedback using the feedback form.
Please note: This form is only to provide feedback. If you require IT support please contact the IT Services Help desk. We can only respond to UCL email addresses.
 Close
Close

