Setting up IPAC LTI:
Releasing the IPAC questionnaire form
Releasing the IPAC questionnaire to students
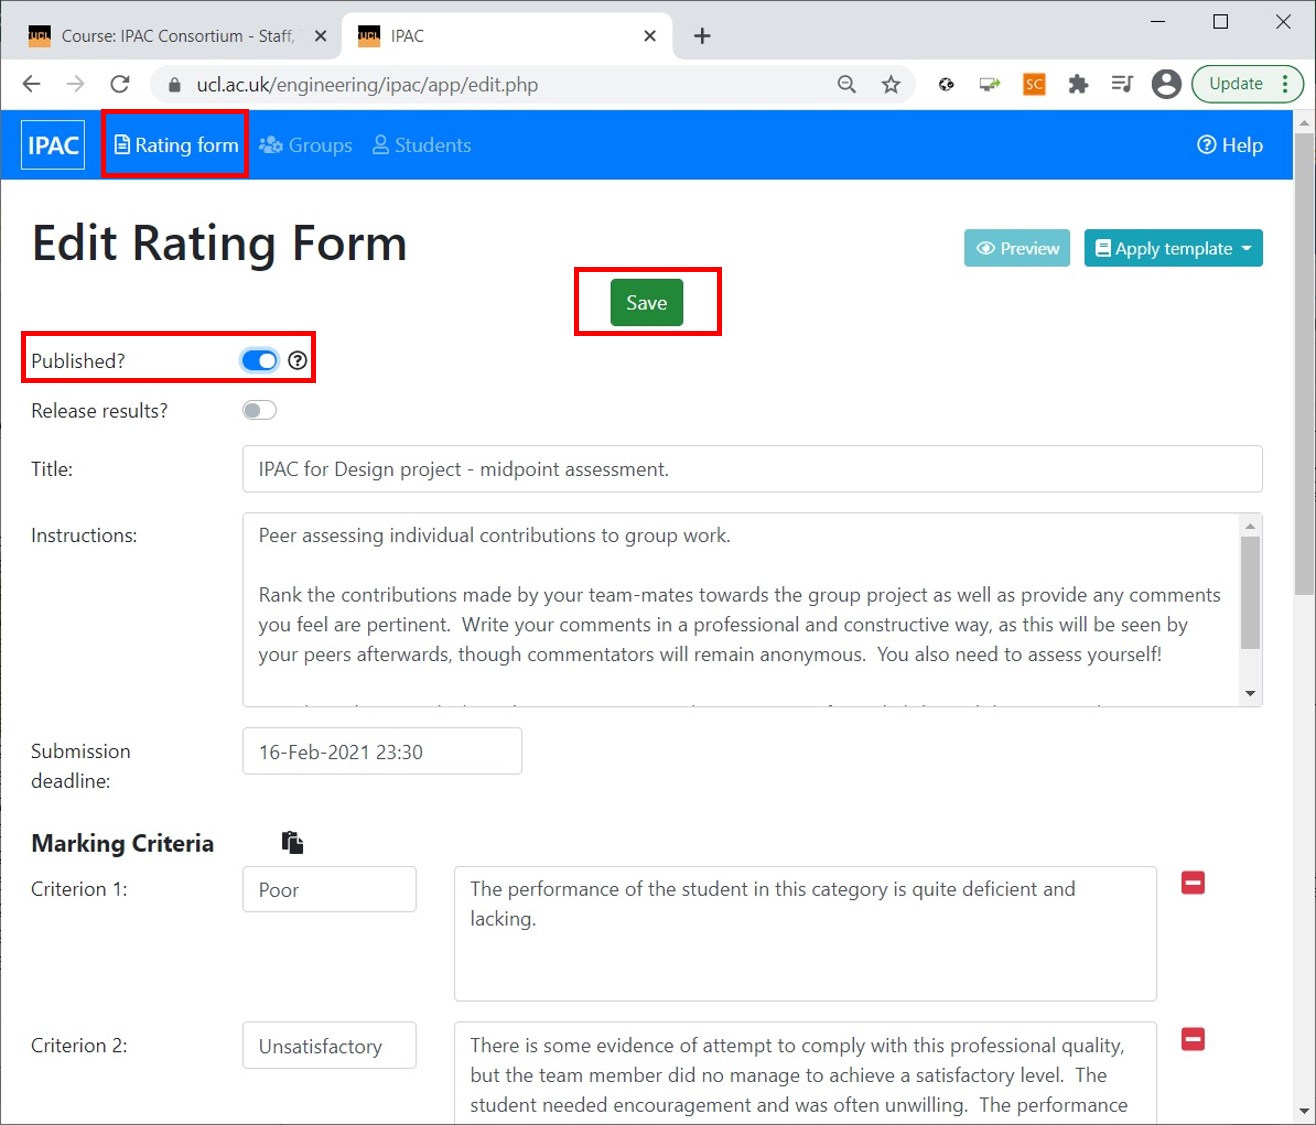
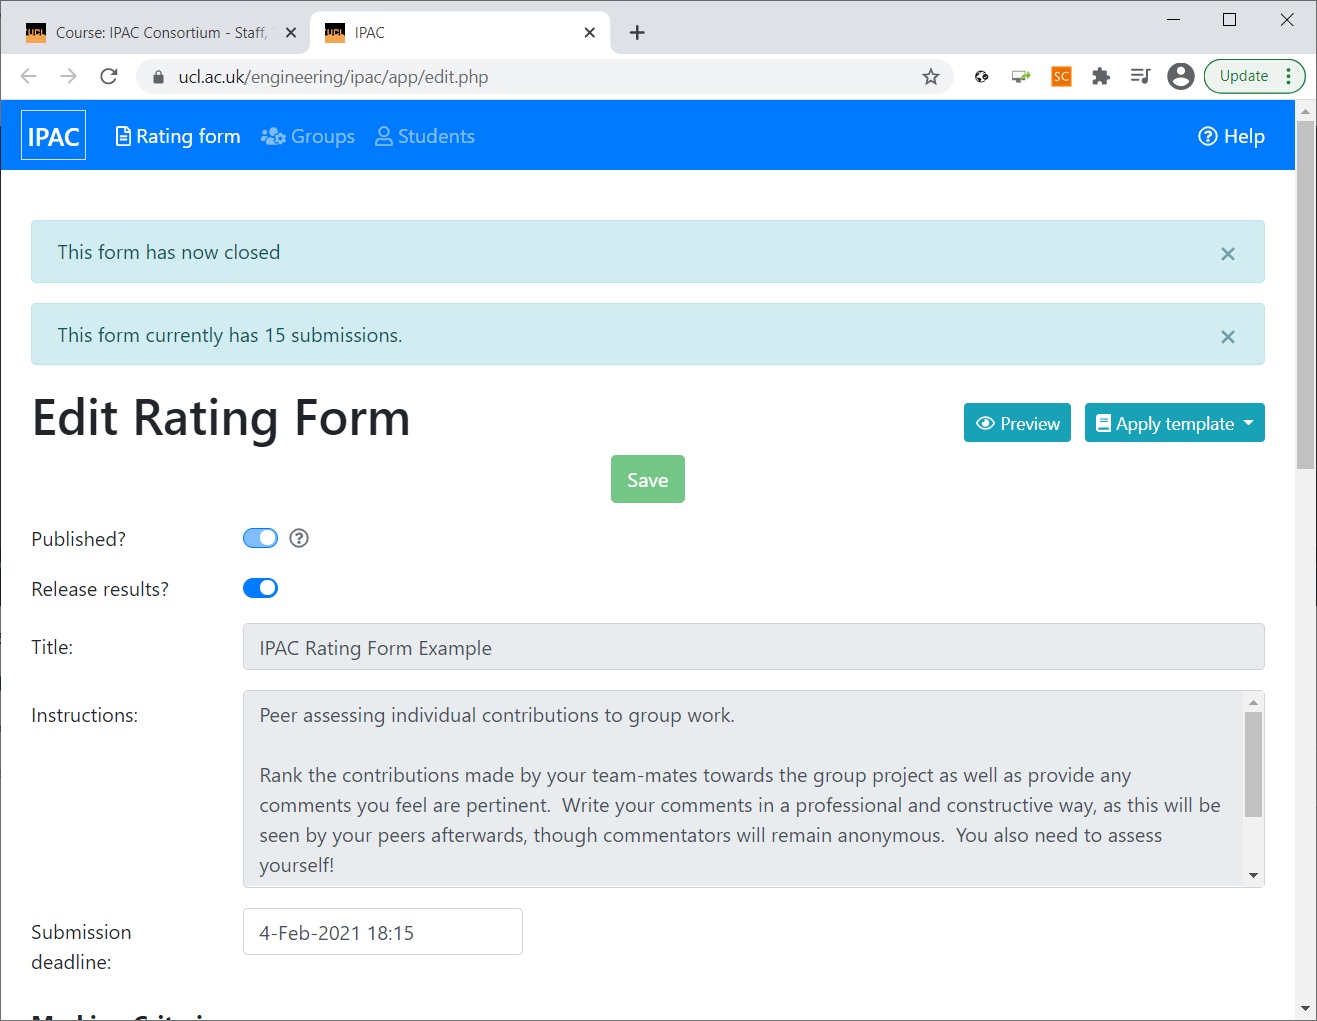
In order to release the IPAC questionnaire to the students, go to ‘Rating Form’ tab and click ‘Published?’ then ‘Save’.
Warnings
See the full process in the video, or the step-by-step explanation below.
Once published, the students cannot be allocated to different groups and the questionnaire becomes uneditable.
If any changes need to be made, the form can be unpublished by clicking on the ‘Published?’ toggle again. Note, however, that this will delete any responses recorded from the students in the meantime.
Handling results
See the full process in the video, or the step-by-step explanation below.
Viewing students’ answers
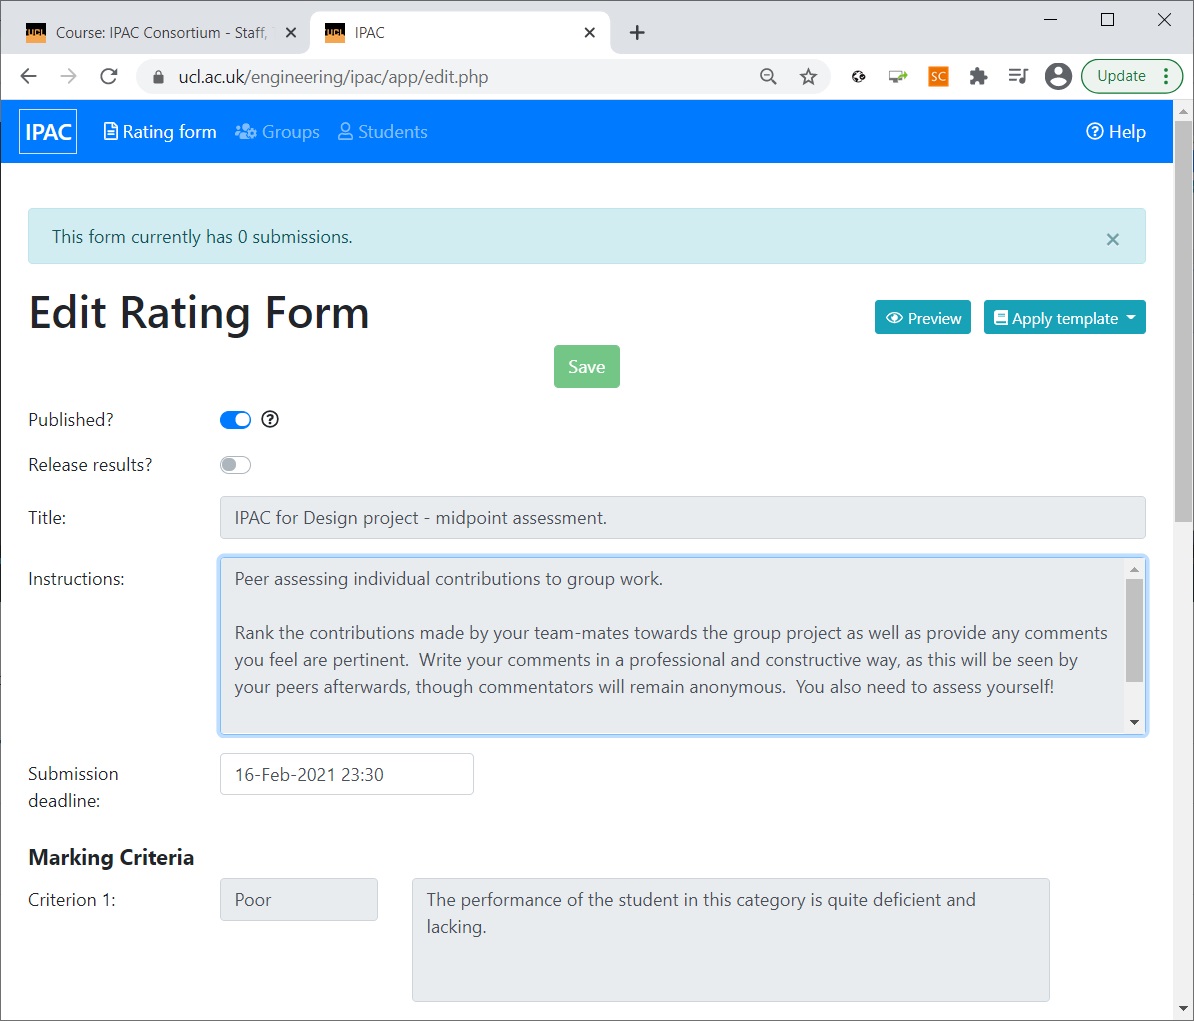
The students’ answers can be accessed by first going to the ‘Rating Form’ tab. A message at the top of the tab will indicate how many submissions there have been for the questionnaire.
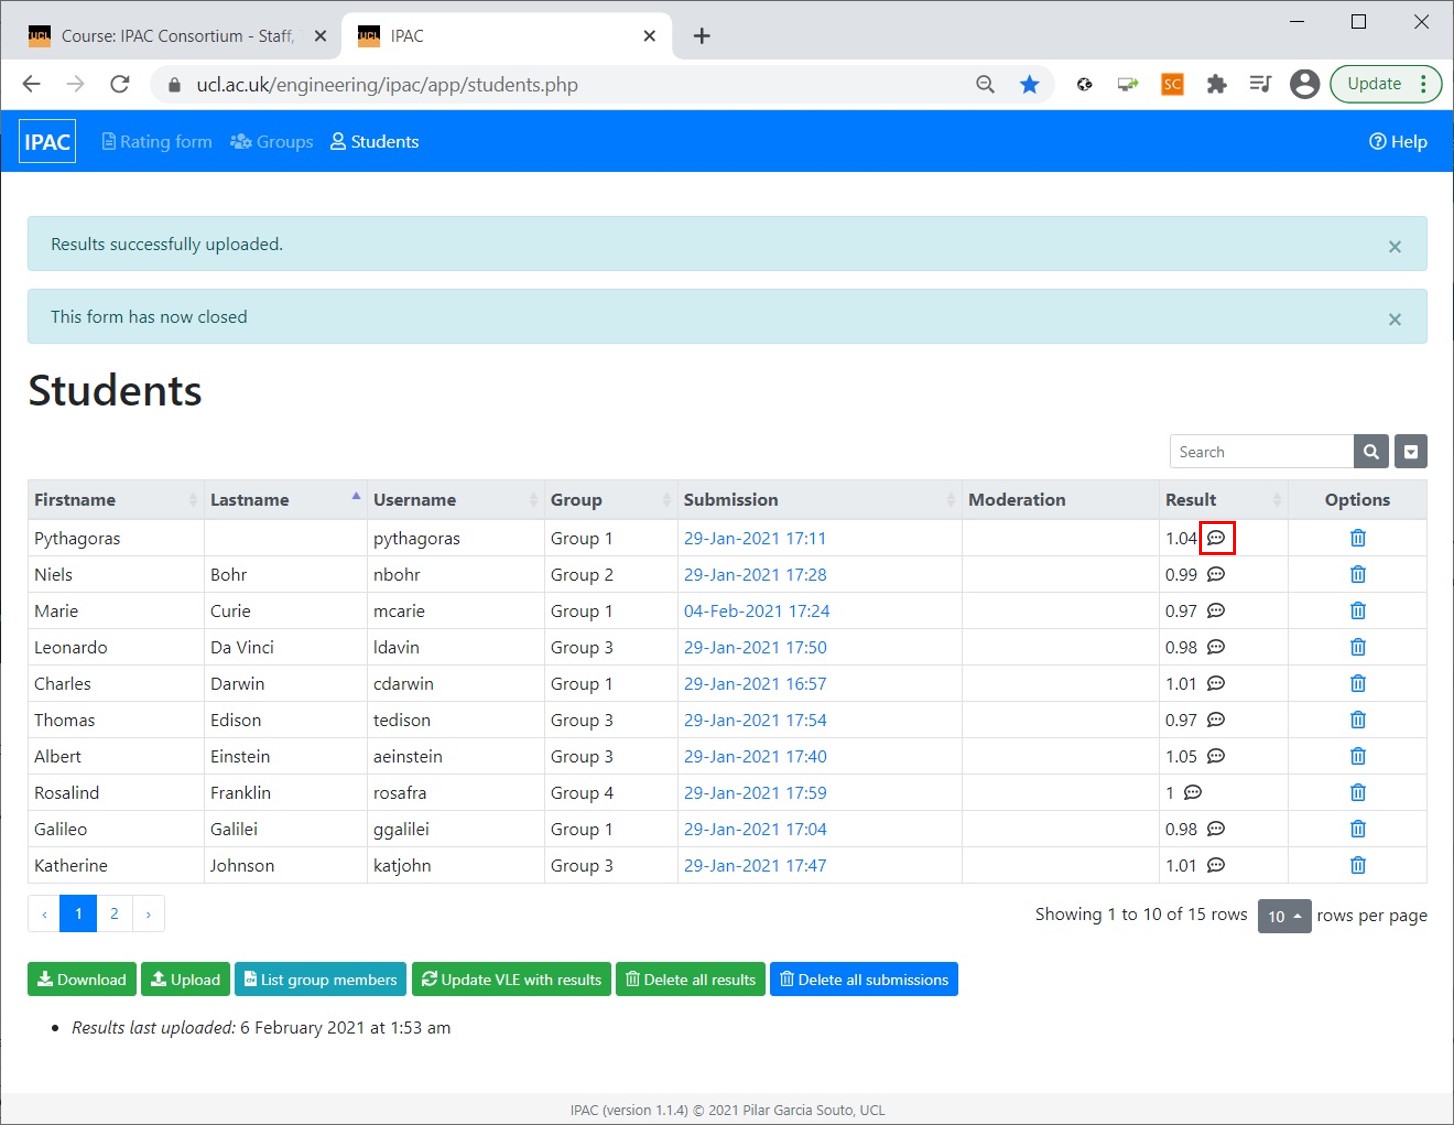
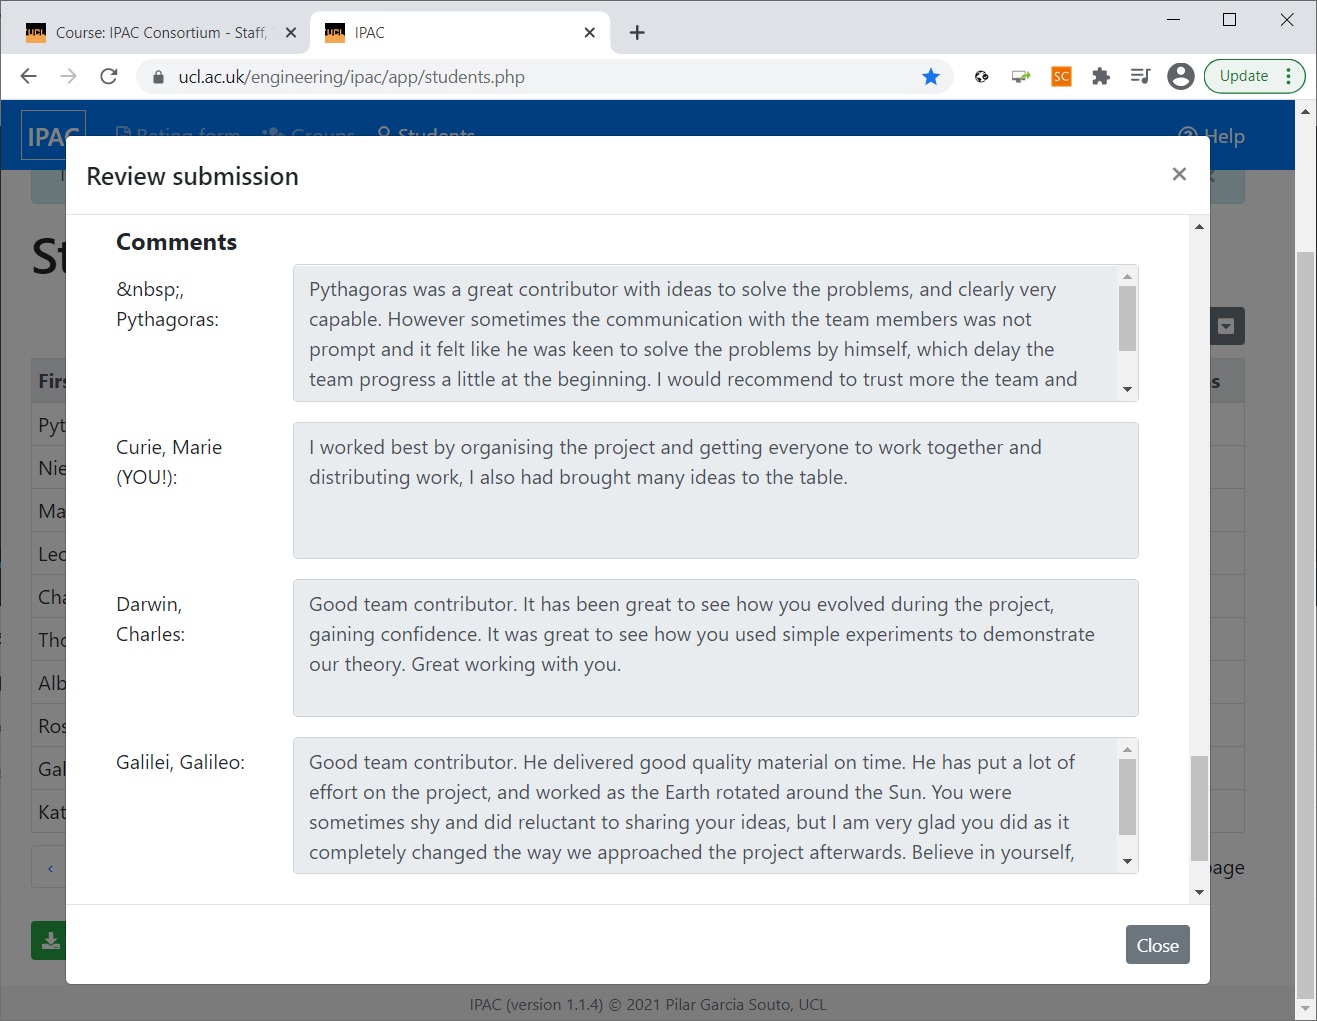
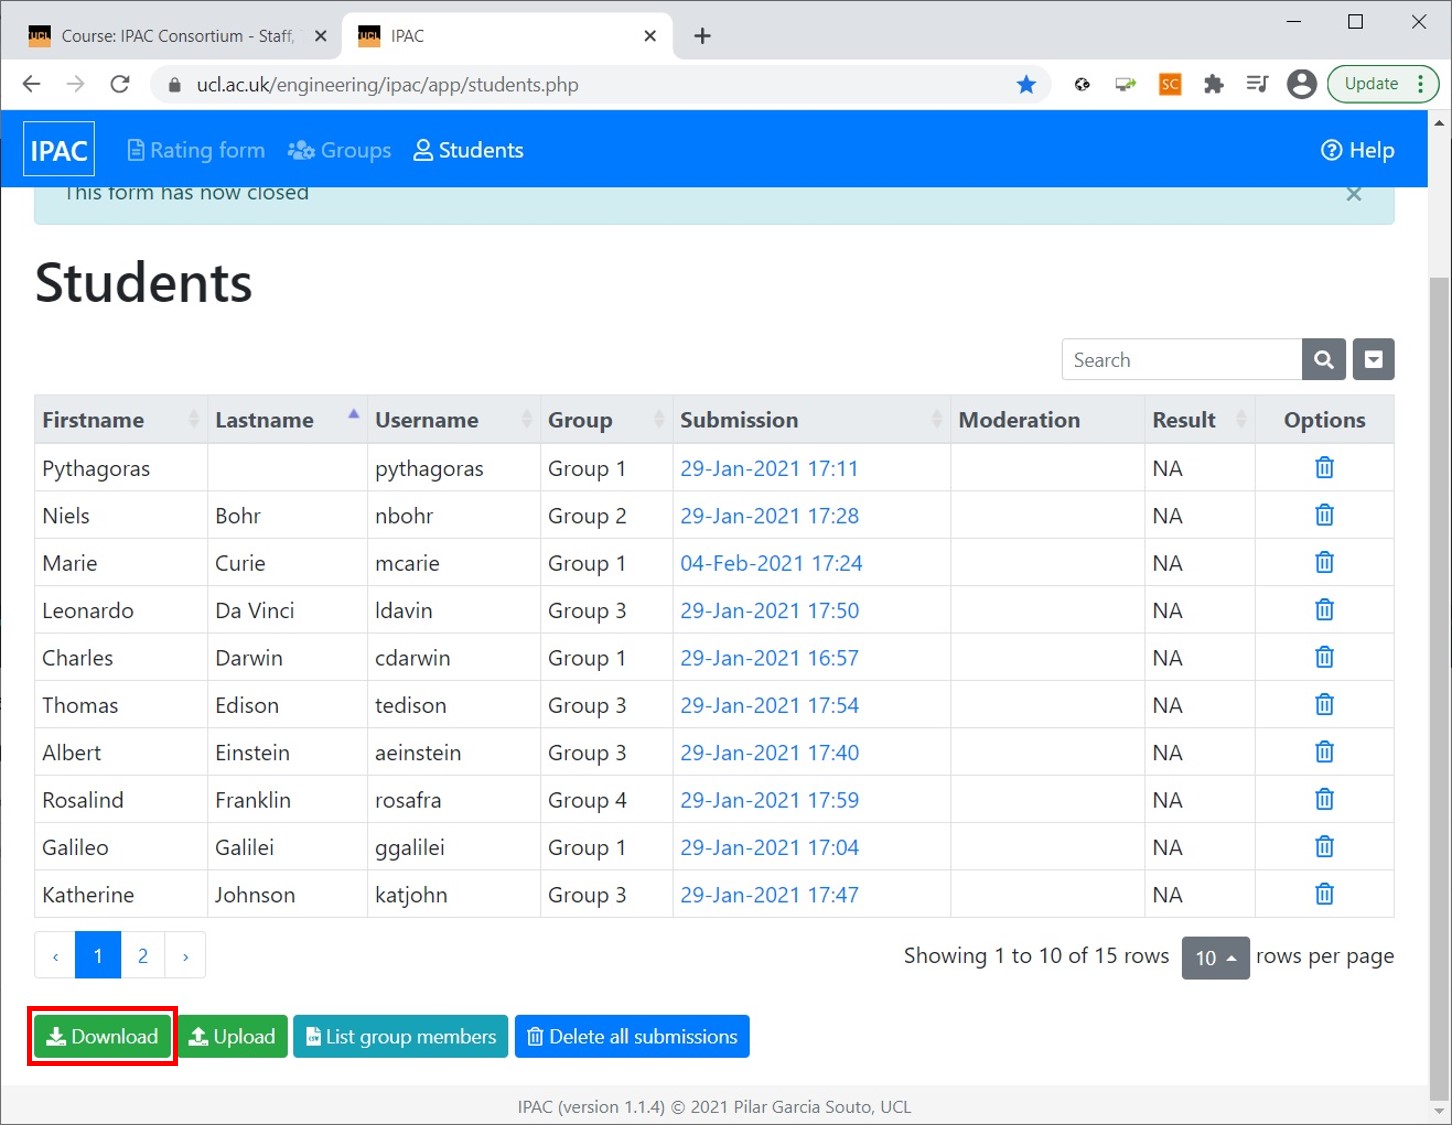
In order to preview the submissions, go to the ‘Students’ tab. This will open a list of all students in the class, as well as their submission dates. Clicking on any of the students opens the form they have submitted.
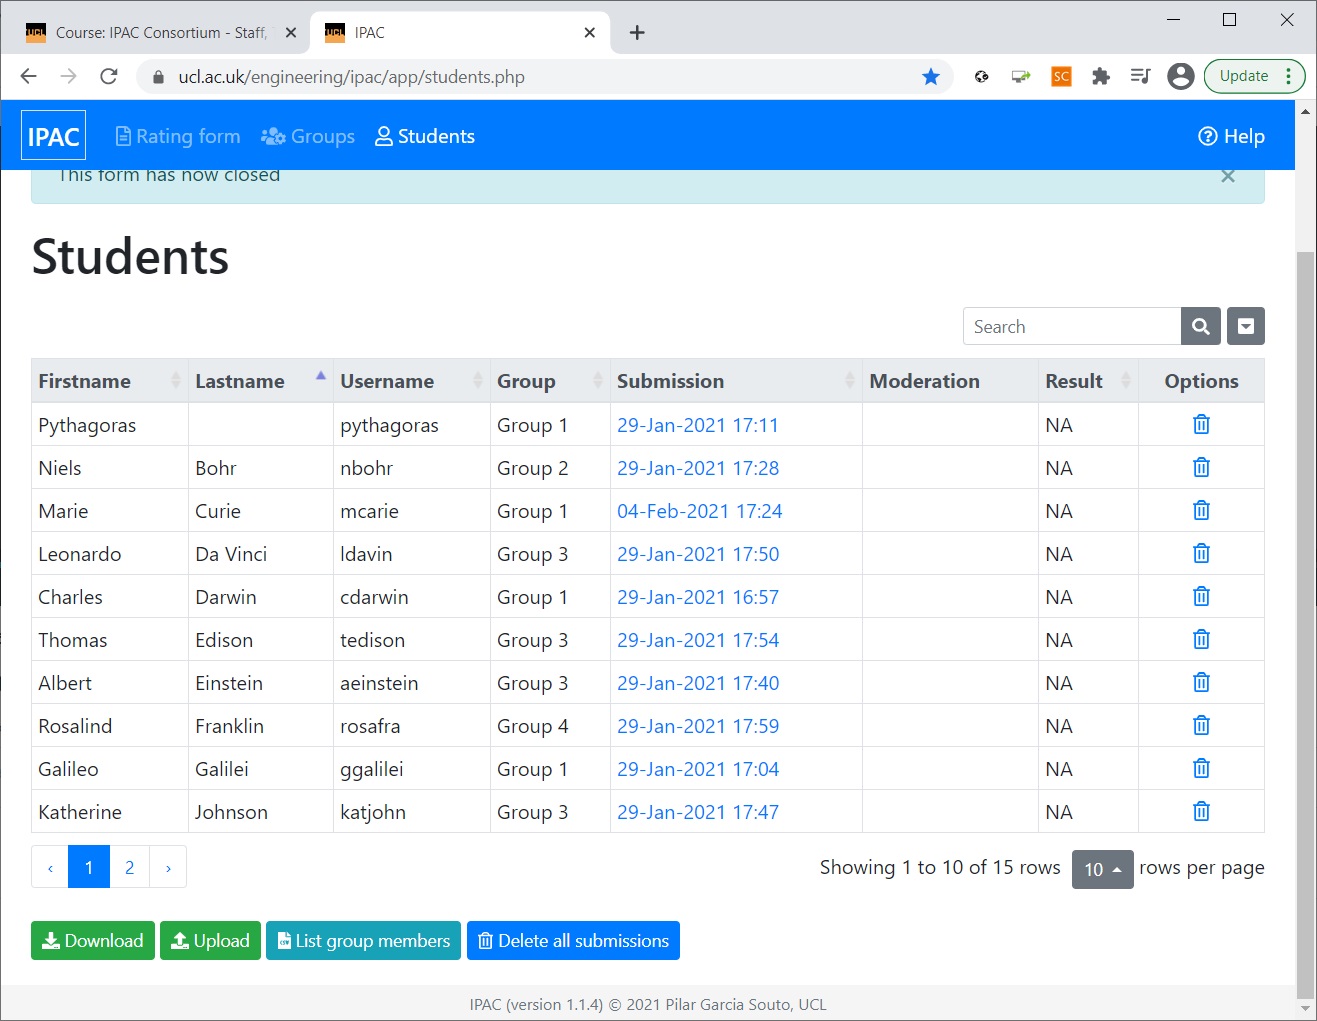
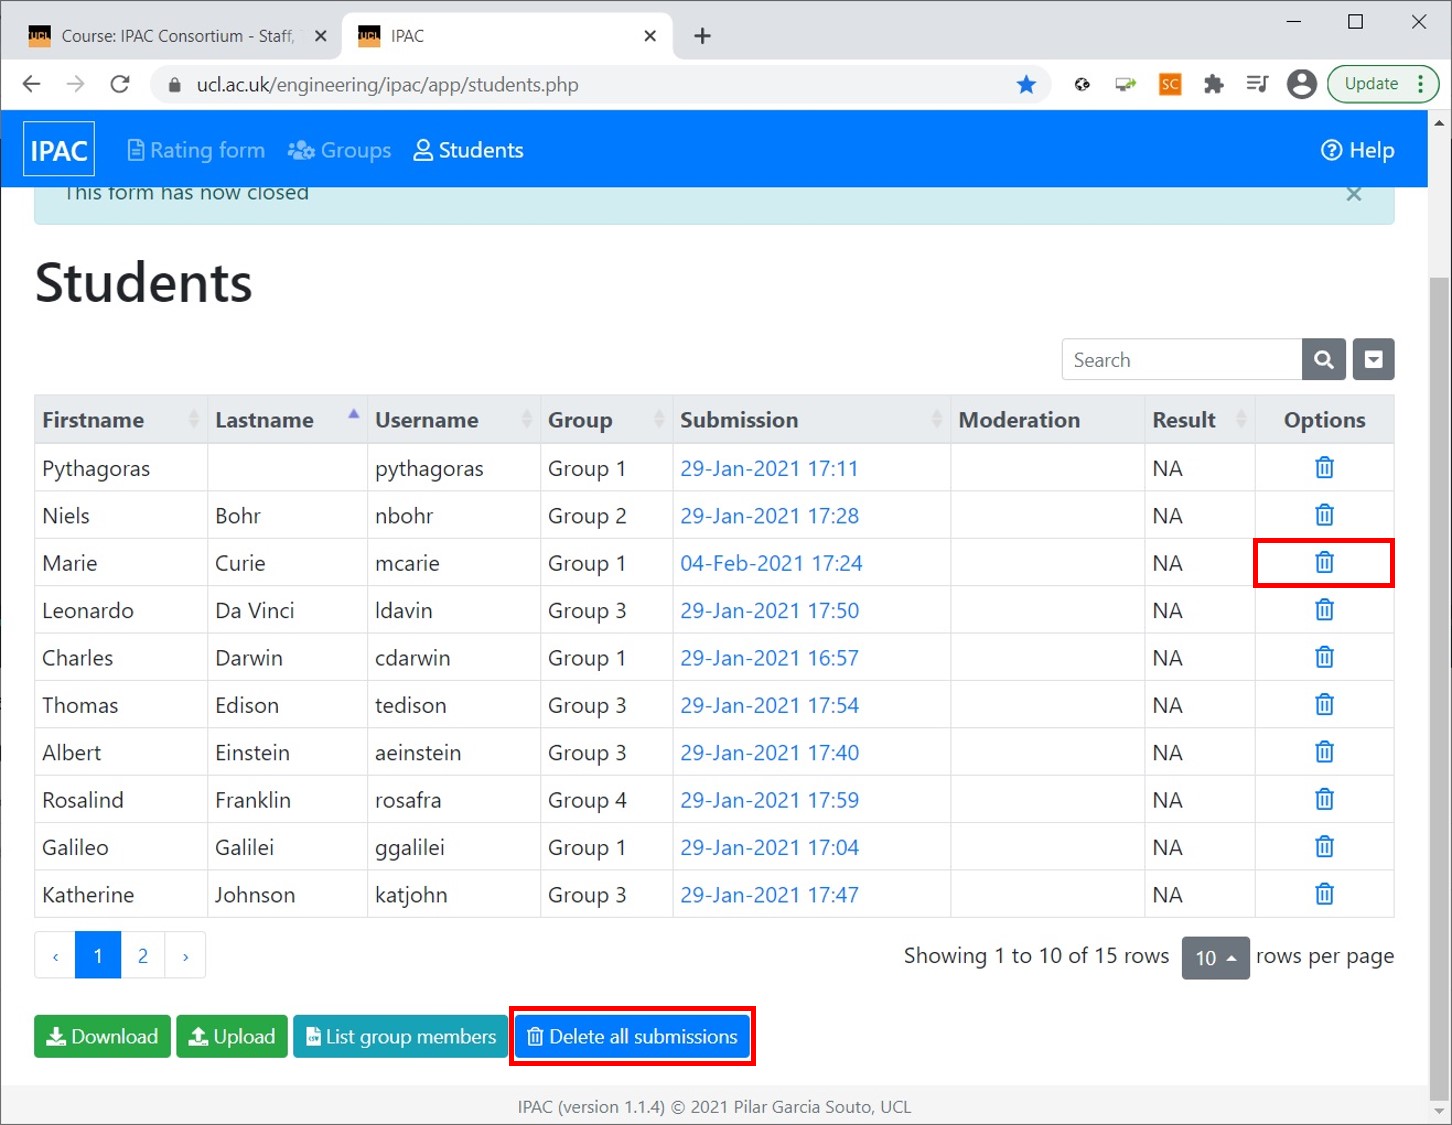
If, for any reason, any of the submissions should be deleted, this can be done by deleting the submissions individually or by clicking on ‘Delete all submissions’ if all the answers should be removed.
Analysis of results
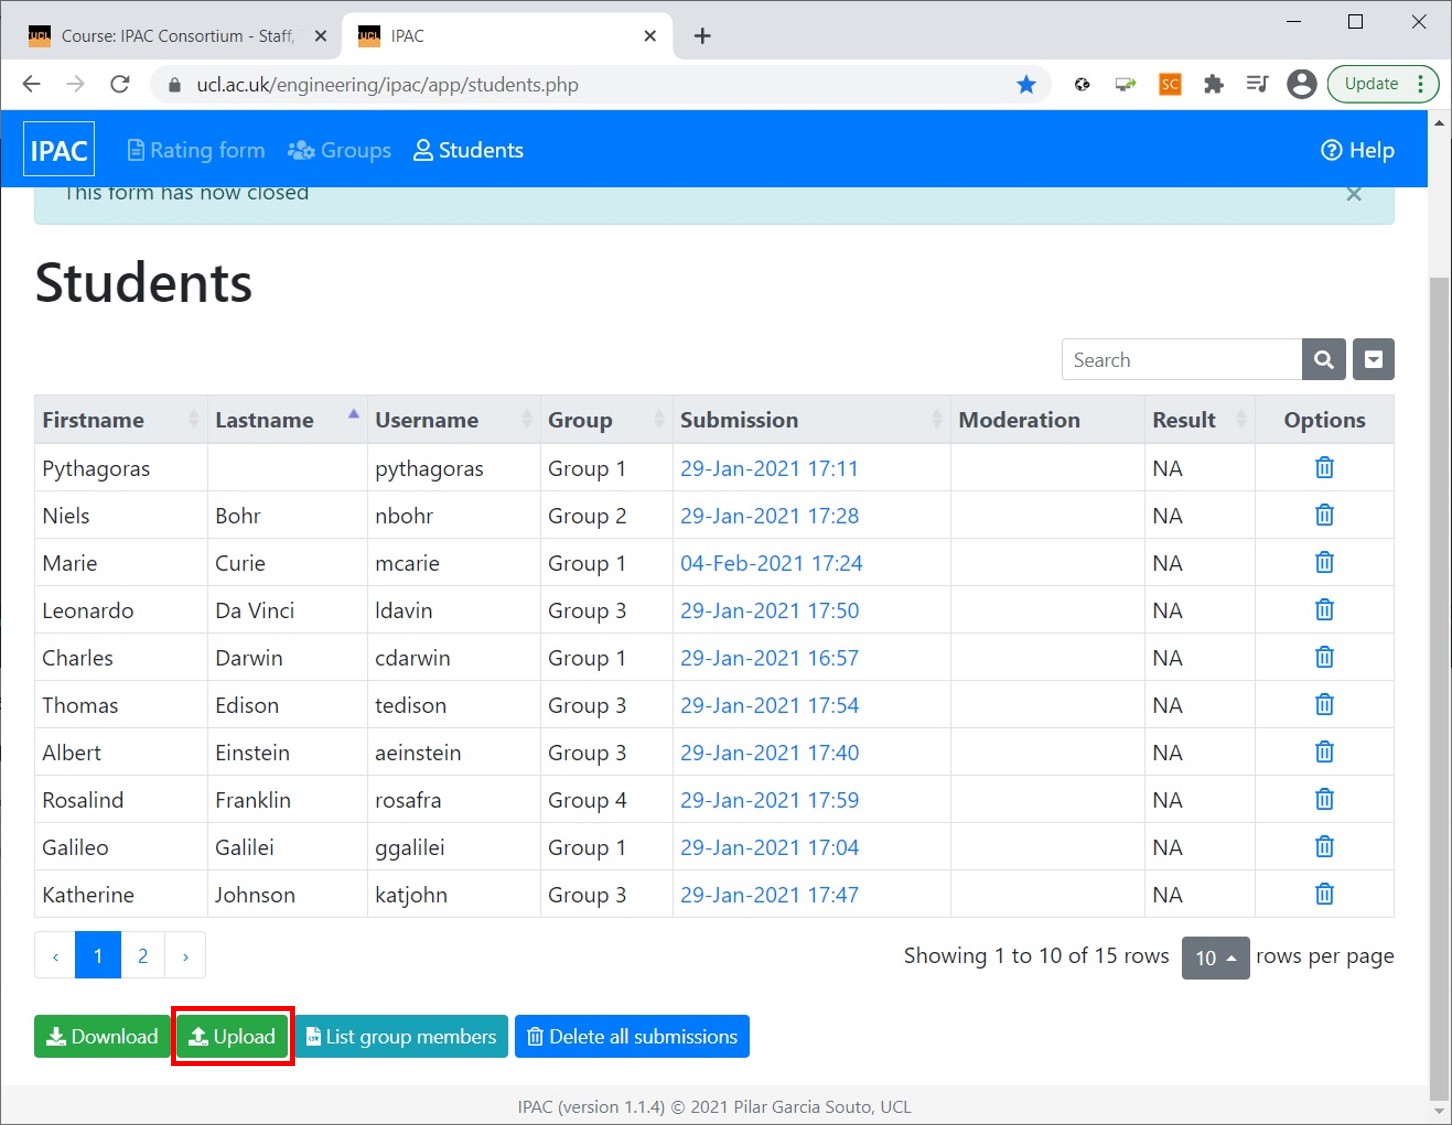
In order to analyse the students’ responses in the IPAC software, the raw data must first be downloaded.
For details on how to do the analysis, please refer to the IPAC software documentation page (Menu > Data analysis with IPAC software).
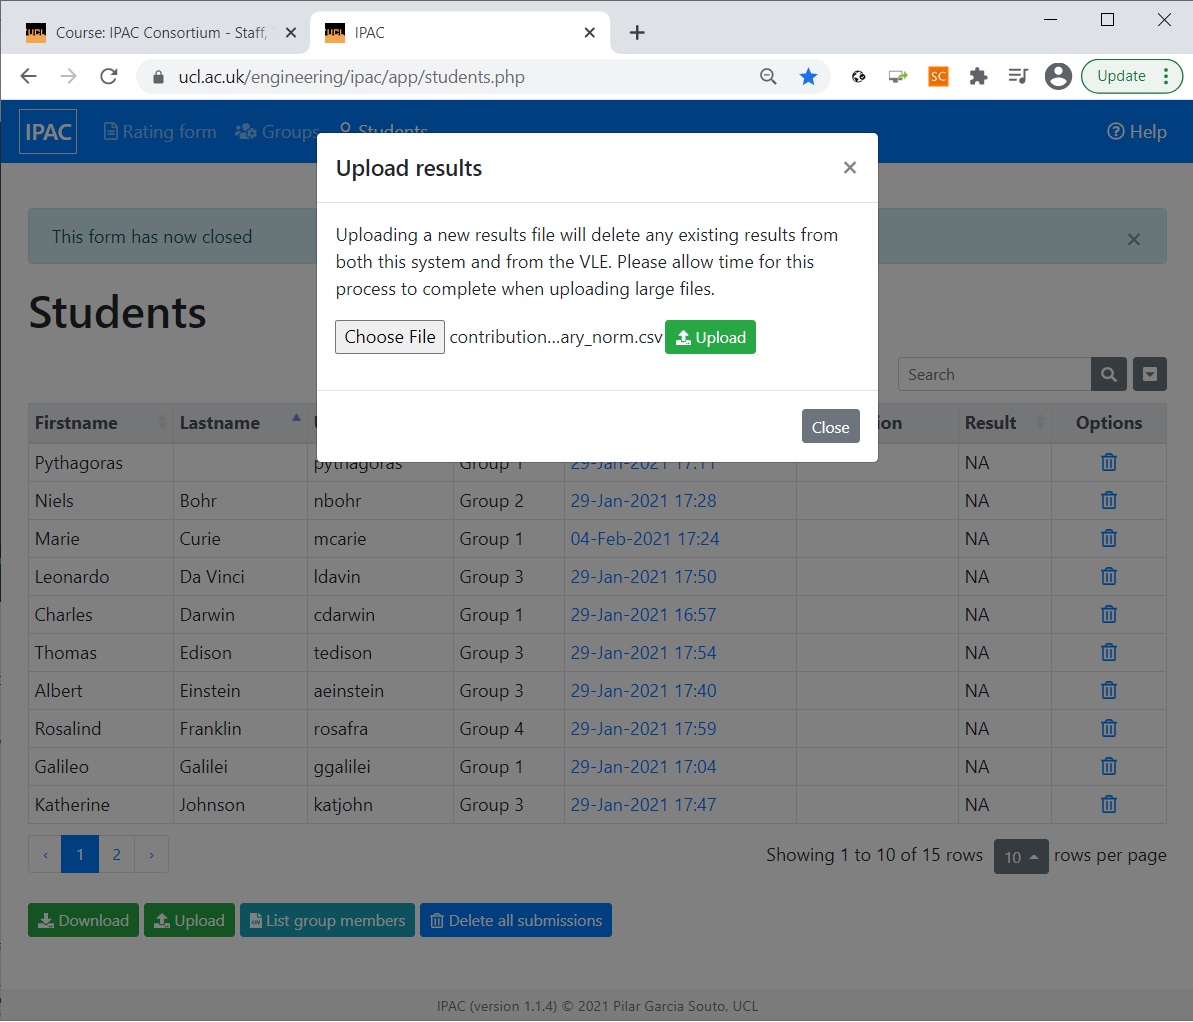
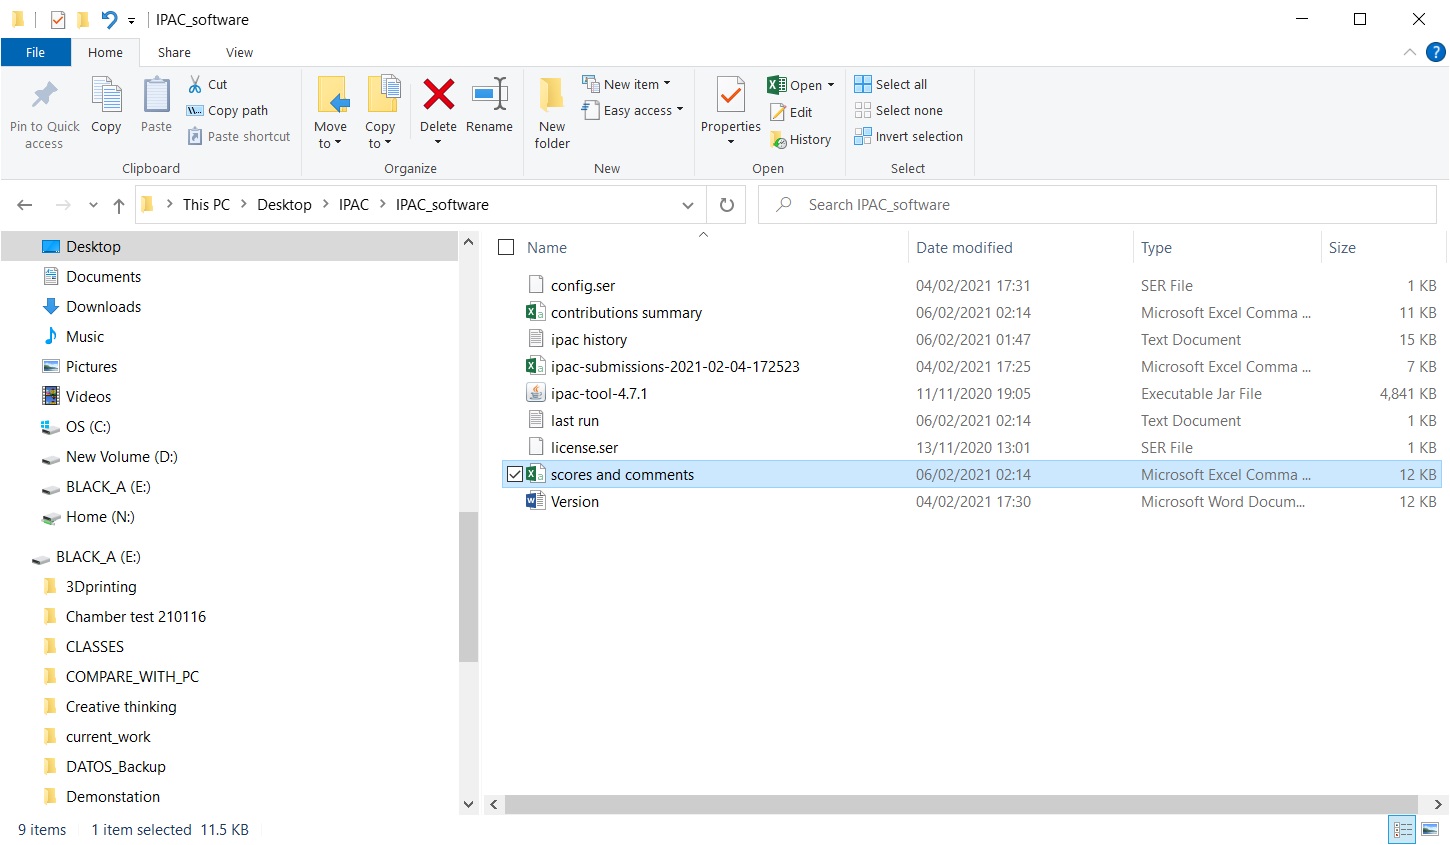
Once the raw data is processed, the results can be uploaded to the VLE by going to the ‘Students’ tab and clicking ‘Upload’. This opens a window for choosing a file where the ‘scores and comments.csv’ file generated by the IPAC software should be selected and ‘Upload’ clicked.
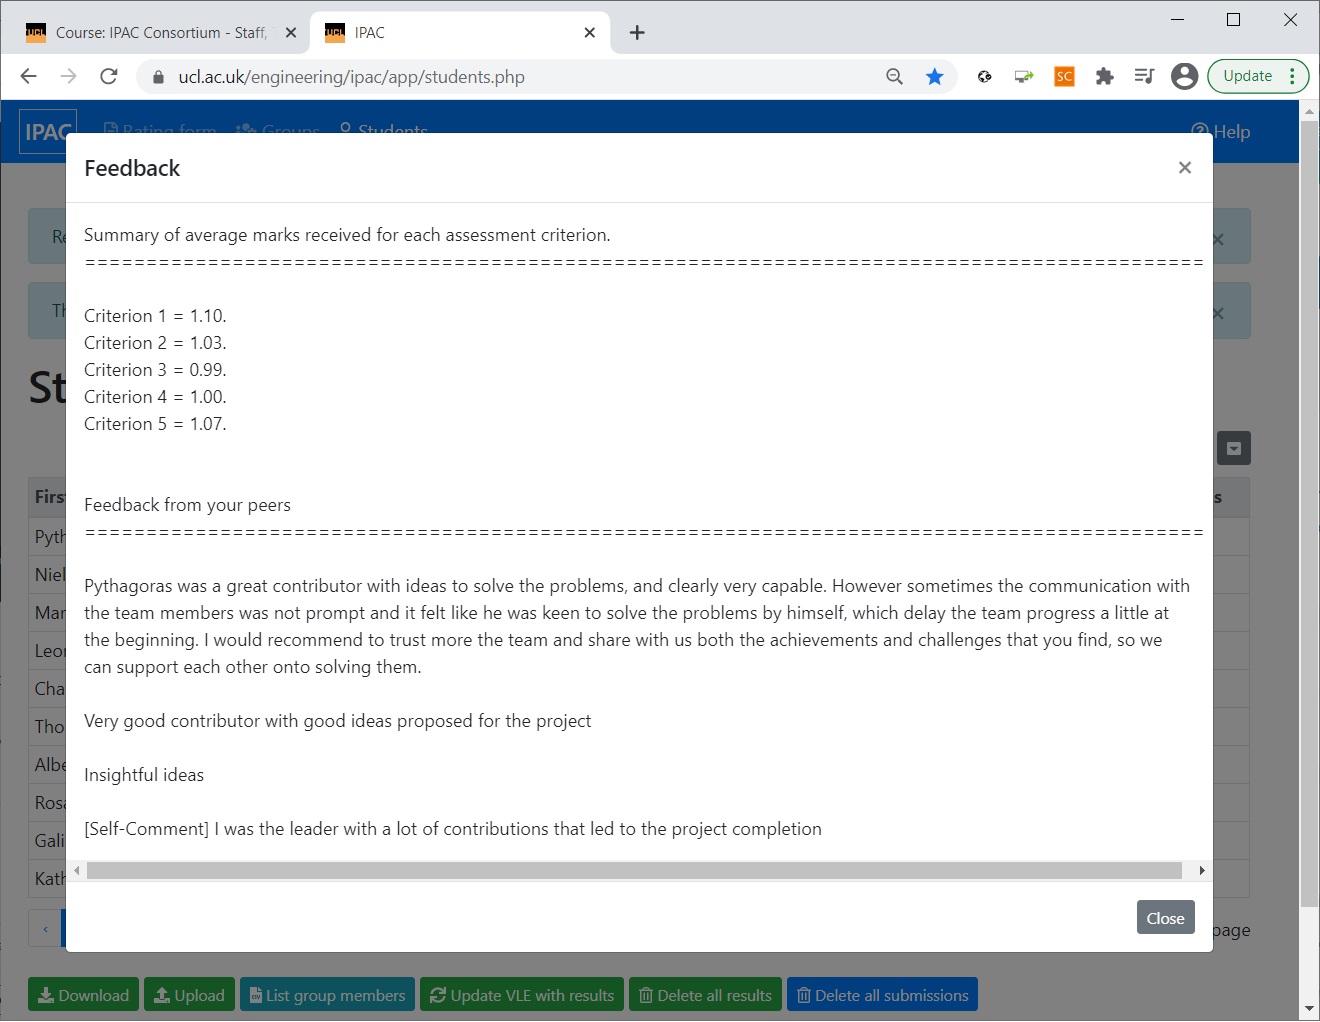
The ‘Result’ column now contains the IPAC scores for each of the students. Clicking on the balloon symbol opens the personalised feedback that will be released to the student. This contains information such as the overall IPAC score, marks per criteria and personalised feedback, as decided by the tutor.